Catholic Tenebrae Service PDF: A Comprehensive Plan
Tenebrae, originating as a Good Friday service, is now observed in the Roman Catholic Church from Holy Thursday through Holy Saturday. Numerous PDF resources offer liturgical texts and visual aids for this evocative practice, steeped in historical and eschatological significance.
I. Historical Origins of Tenebrae
The roots of the Tenebrae service are deeply embedded in the early Christian practices of Jerusalem, dating back to the 4th century. Initially, these weren’t formalized services as we understand them today, but rather extended periods of prayer and lamentation commemorating the Passion of Christ. Accounts detail Christians gathering to observe the hours of darkness preceding Good Friday, mirroring Christ’s agony in the Garden of Gethsemane.
These early observances gradually evolved, particularly within monastic communities. The term “Tenebrae,” derived from the Latin word for “darkness,” aptly describes the service’s central characteristic: a progressive dimming of light symbolizing the abandonment of Christ and the descent into sorrow.
Over time, the practice spread from Jerusalem to other regions, becoming increasingly associated with the liturgical observances of Holy Week. The service wasn’t immediately standardized; variations existed in different locales, reflecting local customs and theological emphases. The core elements – psalms, readings, and the extinguishing of candles – began to coalesce, forming the foundation of the Tenebrae service as it would later be known. The service’s development reflects a desire to intimately connect with the suffering of Christ and anticipate the promise of resurrection.
II. Early Christian Practices (4th Century Jerusalem)
In 4th-century Jerusalem, Christians engaged in solemn observances during the days leading up to Easter, particularly focusing on the events of Christ’s Passion. These weren’t yet the structured Tenebrae services of later centuries, but rather extended vigils and prayers held during the night. Historical accounts, like those referenced in discussions of Great Friday prayers, describe faithful gathering to commemorate Christ’s suffering.
These early practices centered on lamentation and remembrance. The faithful would spend hours in prayer, reflecting on the scriptures detailing Jesus’s arrest, trial, and crucifixion. The atmosphere was one of profound sorrow and anticipation, mirroring the darkness and despair surrounding Christ’s death.
While details are fragmented, it’s clear these vigils were deeply rooted in the belief that participating in Christ’s suffering was a vital aspect of Christian devotion. The emphasis was on communal mourning and a shared experience of grief. These Jerusalem practices laid the groundwork for the formalized Tenebrae service, establishing the core themes of darkness, lamentation, and anticipation of resurrection that would characterize the service for centuries to come. These early forms demonstrate a profound connection to the historical events of Holy Week.
III. The Evolution of Tenebrae in the Medieval Period
During the medieval period, the early Jerusalem vigils evolved into the more structured Tenebrae service we recognize today. Beginning in the monasteries, the practice expanded to cathedral and parish churches throughout Europe. A defining characteristic of this era was the integration of the service into the liturgical hours of Matins and Lauds, specifically for the last three days of Holy Week – Maundy Thursday, Good Friday, and Holy Saturday.
The medieval Tenebrae service became increasingly elaborate, incorporating specific psalms, hymns, and readings chosen to reflect the themes of sorrow, repentance, and anticipation of Christ’s resurrection. The symbolic use of darkness became more pronounced, with candles gradually extinguished throughout the service, representing the waning light of Christ’s life and the growing darkness of Good Friday.
This period also saw the development of unique musical settings, most notably Allegri’s Miserere, composed in the 17th century for use in the Sistine Chapel. The increasing complexity of the service reflected the growing sophistication of medieval liturgical practice and a deepening devotion to the Passion of Christ. The service’s structure solidified, becoming a powerful and moving expression of faith.
IV. Tenebrae and the Liturgical Calendar
Tenebrae’s placement within the liturgical calendar is intrinsically linked to the Triduum – the three holiest days of the Christian year: Holy Thursday, Good Friday, and Holy Saturday. Traditionally, the service was observed during these days, specifically as a combined celebration of Matins and Lauds. This positioning emphasizes the transition from the light of Christ’s life to the darkness of his Passion and death, culminating in the anticipation of his resurrection on Easter Sunday.
The service’s timing within the calendar isn’t arbitrary; it’s designed to deepen the faithful’s participation in the unfolding drama of Holy Week. Each night of Tenebrae focuses on a different aspect of Christ’s suffering, building towards the solemnity of Good Friday. The extinguishing of candles mirrors the diminishing light, symbolizing the withdrawal of Christ’s presence from the world.

While historically a fixed part of the calendar, the 1955 suspension (discussed later) altered its official status. However, with renewed interest in liturgical traditions, many parishes now incorporate adapted forms of Tenebrae, often utilizing available PDF resources to guide the service and maintain its connection to the sacred calendar.
V. The Meaning of “Tenebrae” ─ Darkness and Shadow
The very name “Tenebrae,” derived from the Latin word for “darkness,” encapsulates the service’s core theological and symbolic meaning. It isn’t merely a descriptive term for a dimly lit service, but a profound representation of the spiritual darkness experienced during the Passion of Christ. This darkness symbolizes the abandonment felt by Christ as he faced betrayal, suffering, and ultimately, death on the cross.
The deliberate use of increasing darkness throughout the service – achieved through the gradual extinguishing of candles – visually reinforces this theme. It mirrors the descent into the depths of human sin and the overshadowing of God’s light by evil. PDF guides for the service often emphasize the importance of creating a truly somber atmosphere to facilitate this contemplation.
Furthermore, “shadow” represents the uncertainty and fear experienced by Christ’s disciples as they witnessed his suffering. The Catholic tradition utilizes this symbolism to invite the faithful to confront their own spiritual darkness and to seek solace in the promise of Christ’s resurrection. The downloadable PDF resources frequently include reflections on these themes.
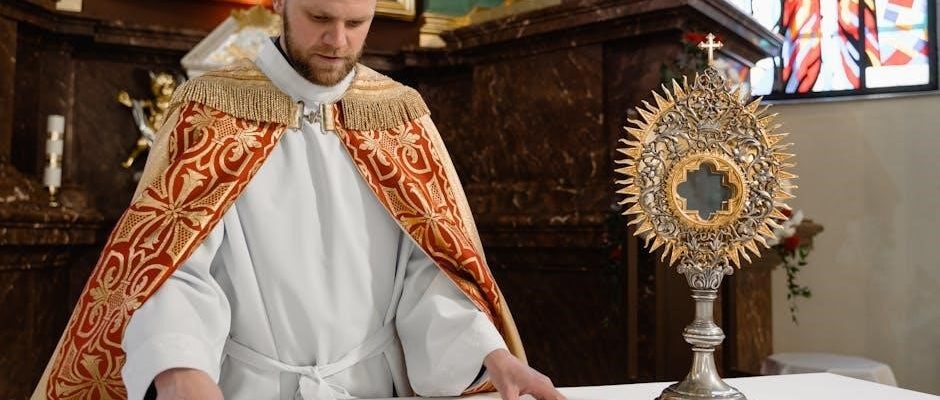
VI. Structure of the Traditional Tenebrae Service
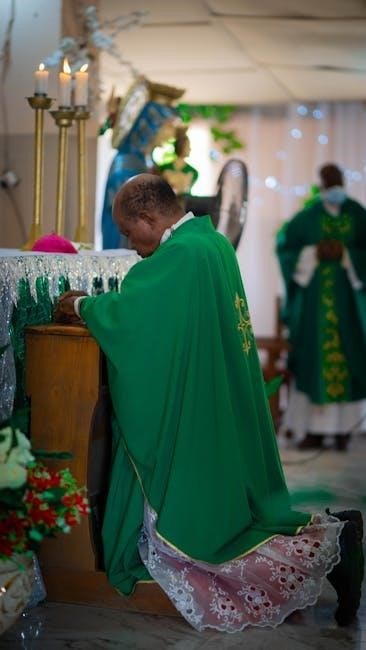
The traditional Tenebrae service, detailed in many available PDF guides, is structured around the Offices of Matins and Lauds, typically observed on the last three days of Holy Week. It’s a solemn and protracted liturgy, designed to evoke deep contemplation of Christ’s Passion. The service unfolds with a series of psalms, lessons, and responsories, each contributing to the overarching theme of darkness and mourning.

A key element is the gradual extinguishing of candles, often placed on a stand representing the Tree of Life. With each psalm or set of verses, a candle is extinguished, symbolizing the increasing darkness surrounding Christ’s crucifixion. Catholic liturgical PDFs meticulously outline the order of extinguishing, ensuring a consistent and symbolic progression.
The service culminates in a period of profound silence and darkness, broken only by the “Strepitus” – a sudden, dramatic noise intended to represent the earthquake following Christ’s death. Many downloadable PDFs offer suggestions for creating this effect, ranging from striking metal objects to dropping a cloth. The service concludes without a blessing, emphasizing the weight of grief and anticipation of the Resurrection.
VII. Matins and Lauds Components
Tenebrae fundamentally comprises the canonical Hours of Matins and Lauds, traditionally performed in a combined form. Numerous Catholic PDF resources detail the specific psalms, hymns, and readings assigned to each component, reflecting the penitential nature of Holy Week. Matins, the first liturgical hour, focuses on nocturnal praise and repentance, while Lauds anticipates the coming dawn and the hope of redemption.
PDF guides often present the selection of psalms arranged in a specific order, typically including those expressing lamentation and supplication. Lessons, drawn from the Old and New Testaments, narrate prophecies and events foreshadowing Christ’s suffering. Responsories, short verses sung between the readings, amplify the themes of darkness, betrayal, and abandonment.
The structure within PDFs emphasizes a gradual descent into darkness, mirroring the spiritual state of the disciples. Lauds, though traditionally a celebration of dawn, is presented in Tenebrae as a muted anticipation, overshadowed by the preceding grief. Detailed rubrics within these PDFs guide the proper execution of each element, ensuring a reverent and meaningful observance.
VIII. Psalm 51 (Miserere) and Allegri’s Setting
Psalm 51, the Miserere, holds a central position within the Tenebrae service, embodying profound repentance and a plea for divine mercy. Many Catholic PDF resources dedicated to Tenebrae include the full text of the psalm in Latin and English, facilitating congregational participation or choral recitation. Its verses resonate deeply with the themes of sin, sorrow, and the longing for forgiveness prevalent during Holy Week.
Gregorio Allegri’s exquisite setting of the Miserere, composed in the 1630s for the Sistine Chapel, is particularly renowned. PDFs often provide historical context regarding its creation and its association with the papal liturgy. The piece is celebrated for its soaring soprano lines and intricate polyphony, creating an atmosphere of intense emotionality.
While traditionally performed by a small choir, modern adaptations, detailed in some PDF guides, may offer simplified arrangements for parish choirs. Access to sheet music and vocal parts is frequently included or linked within these resources. The Miserere, whether in its original Allegri setting or a more accessible arrangement, remains a powerful and moving element of the Tenebrae experience.
IX. The Role of Darkness in the Service
Darkness is not merely an atmospheric element within the Tenebrae service; it’s a core symbolic component, representing the spiritual darkness of Good Friday and the grief surrounding Christ’s Passion. Catholic PDF guides consistently emphasize this thematic importance, detailing how the gradual extinguishing of candles mirrors the waning of Christ’s life and the descent into sorrow.
These PDF resources often provide specific instructions for creating the appropriate lighting conditions, suggesting the use of multiple candles placed around the sanctuary. The progressive dimming, typically occurring after each psalm or canticle, visually embodies the increasing darkness. Some guides even offer diagrams illustrating candle placement and extinguishing sequences.
The symbolic weight of darkness extends to the eschatological themes of Tenebrae, foreshadowing the three days of darkness that followed Christ’s crucifixion. PDFs frequently connect this practice to the anticipation of the Resurrection. The complete darkness at the service’s conclusion signifies the depth of loss and the waiting for the dawn of Easter, a powerful visual representation of faith and hope.
X. Symbolic Actions: Extinguishing Candles
The extinguishing of candles during Tenebrae is arguably the most recognizable symbolic action, meticulously detailed in available Catholic PDF service guides. These resources clarify that the practice isn’t simply about reducing light, but a deliberate representation of Christ’s abandonment and the extinguishing of hope during his Passion. Each candle extinguished corresponds to a specific event or figure associated with the crucifixion narrative;
PDFs often provide a precise order for extinguishing the candles, typically beginning with candles representing the Apostles, then moving to figures like St. Peter and St. John. The final candles, representing Christ himself, are extinguished with a dramatic effect, often accompanied by the strepitus (see section XI). Detailed rubrics within these guides ensure consistency in this symbolic act.
Many PDFs include notes for the officiant, emphasizing the importance of performing the extinguishing slowly and reverently. The visual impact of the diminishing light is intended to create a profound sense of loss and anticipation. Some guides even suggest specific prayers or reflections to be recited during the extinguishing process, deepening the symbolic meaning for the congregation.
XI. The “Strepitus” ─ The Clamor
The strepitus, a sudden and dramatic noise, is a crucial element of the Tenebrae service, thoroughly explained within comprehensive Catholic PDF guides. Historically, this clamor simulated the earthquake following Christ’s death, as described in the Gospels. Modern PDF resources detail how this is traditionally achieved – by dropping a book, slamming doors, or even using a pre-recorded sound effect.
These liturgical guides emphasize that the strepitus isn’t merely a startling sound, but a symbolic representation of the chaos and upheaval caused by Christ’s sacrifice. It signifies the disruption of the old order and the opening of the way to salvation. PDFs often specify the precise moment for the strepitus – immediately after the extinguishing of the final candle representing Christ.
Many PDFs offer variations for the strepitus, acknowledging differing parish traditions. Some suggest a more subdued approach, while others advocate for a more forceful and dramatic effect. The intention, as outlined in these resources, is always to evoke a sense of shock and awe, prompting contemplation of the profound mystery of the Passion.
XII. Historical Variations in Tenebrae Observance
Catholic Tenebrae services, as detailed in numerous historical PDF documents, haven’t remained static; significant variations existed across time and geography. Early medieval practices differed considerably from those of the later Middle Ages, with regional customs heavily influencing the service’s structure. PDF resources showcase how the inclusion of specific psalms and readings varied widely.
Some PDFs highlight the evolution of the strepitus itself, noting that its intensity and method of execution changed over centuries. Initially, it might have been a simple, localized noise, evolving into a more elaborate and theatrical event. Furthermore, the length of the service and the number of candles extinguished weren’t standardized, leading to diverse observances.
These historical PDFs also reveal that the practice of Tenebrae wasn’t universally adopted. Certain monastic orders and dioceses embraced it wholeheartedly, while others showed less enthusiasm. The suppression in 1955, documented in liturgical PDFs, further illustrates the fluctuating fortunes of this ancient rite, demonstrating its complex and evolving history within the Catholic Church.
XIII. Regional Differences in Practice
Examining Catholic Tenebrae service PDFs reveals striking regional variations in practice. While the core elements remained consistent – the extinguishing of candles, the chanting of psalms, and the strepitus – the specifics differed significantly across Europe and beyond; PDF liturgical guides from France, for example, often detail a more restrained and solemn approach compared to the more dramatic presentations found in Italian PDF resources.
German PDFs frequently emphasize the role of specific hymns and motets, showcasing a strong musical tradition within their Tenebrae observances. Spanish PDFs, conversely, might highlight unique penitential practices incorporated into the service. These differences weren’t merely stylistic; they reflected distinct theological emphases and cultural sensibilities.
Furthermore, access to resources, as evidenced by the availability of detailed PDFs, also played a role. Regions with strong monastic traditions tended to preserve more elaborate and historically informed versions of the service. The study of these regional PDFs underscores the rich diversity within Catholic liturgical practice and the localized evolution of Tenebrae over centuries.
XIV. The Suppression and Revival of Tenebrae
Catholic Tenebrae service PDFs often include historical notes detailing the service’s suppression in 1955. Following liturgical reforms initiated by the Second Vatican Council, the practice was largely discontinued, deemed overly elaborate and potentially overshadowing the central Paschal Mystery. Many existing PDF liturgical books from before this period became historical artifacts, documenting a lost practice.
However, the late 20th and early 21st centuries witnessed a significant revival of interest in Tenebrae. This resurgence was fueled by a desire to reconnect with pre-Vatican II liturgical traditions and a renewed appreciation for the service’s powerful symbolism. New PDF resources began to circulate, offering adapted forms of the service compliant with current liturgical norms.
These modern PDF guides demonstrate a careful balance between historical fidelity and contemporary liturgical principles. The availability of these resources, often created by seminaries and liturgical commissions, facilitated the reintroduction of Tenebrae into many parishes. The story of suppression and revival, documented in these PDFs, highlights the dynamic nature of liturgical practice within the Catholic Church.
XV. Reasons for the 1955 Suspension
Catholic Tenebrae service PDFs from the pre-1955 era offer a glimpse into the elaborate rituals that ultimately led to its suspension. The primary concern, as detailed in post-Vatican II liturgical discussions often included in modern PDF analyses, was the potential for Tenebrae to overshadow the solemnity of the Easter Triduum, particularly the Paschal Vigil.
Critics argued the service’s dramatic elements – the extinguishing of candles, the strepitus (clamor), and the overall atmosphere of profound darkness – could inadvertently draw attention to the spectacle itself rather than to the spiritual realities of Christ’s Passion and Resurrection. PDF documents from the period reveal anxieties about a focus on sensory experience over theological contemplation.
Furthermore, the complexity of the service, requiring significant musical and liturgical resources, made it inaccessible to many parishes. The 1955 decision, documented in various Catholic historical PDFs, aimed to simplify the Holy Week observances and prioritize the core liturgical celebrations. The suspension wasn’t a condemnation of the practice itself, but a judgment regarding its place within the reformed liturgical landscape.
XVI. Current Status of Tenebrae in the Catholic Church
Despite the 1955 suspension, interest in the Catholic Tenebrae service persists, evidenced by the continued availability of historical PDFs and modern adaptations. While not officially part of the universal liturgical calendar, certain dioceses and religious communities have obtained permission to celebrate adapted forms of Tenebrae.
These permitted versions, often detailed in PDF guides circulated within these communities, typically omit elements deemed problematic in the past, such as the strepitus. Emphasis is placed on the scriptural readings, psalms, and hymns, fostering a contemplative atmosphere. Many PDF resources now offer simplified musical settings, making the service more accessible.
The Second Vatican Council’s emphasis on active participation and renewed liturgical understanding has influenced these adaptations. Modern Catholic Tenebrae services, as reflected in available PDFs, prioritize the theological significance of darkness and silence as symbols of mourning and anticipation. The service remains a powerful expression of faith for those who experience it, demonstrating a continued reverence for tradition within a contemporary context.
XVII. Permitted Forms and Adaptations
Following the 1955 suspension, adaptations of the Catholic Tenebrae service emerged, detailed in numerous PDF guides. These permitted forms generally retain the core structure of Matins and Lauds from the last three days of Holy Week, but modify certain elements. The controversial strepitus, a dramatic climax involving noise, is almost universally omitted in contemporary adaptations found in PDF format.
PDF resources often showcase simplified versions of Allegri’s Miserere, or alternative musical selections, to enhance congregational participation. Emphasis shifts towards the profound symbolism of extinguishing candles, representing the diminishing light of Christ’s Passion. Liturgical texts, readily available as PDF downloads, are often accompanied by suggested readings and prayers.
Adaptations prioritize a more meditative and reflective experience. Diocesan guidelines, often distributed as PDF documents, may permit the inclusion of contemporary hymns or devotional practices alongside traditional elements. These revised services aim to balance historical reverence with modern liturgical principles, offering a meaningful experience within the bounds of current Catholic practice.
XVIII. Finding Tenebrae Service PDFs Online
Locating Catholic Tenebrae service PDFs is readily achievable through various online resources. Diocesan websites frequently host liturgical materials, including complete service outlines in PDF format, tailored to local practices. Parish websites often provide downloadable PDFs for their specific Tenebrae observances, showcasing adaptations and musical selections.
Liturgical publishers and online retailers offer comprehensive PDF collections of Holy Week services, with dedicated sections for Tenebrae. Websites specializing in Catholic liturgical resources are invaluable sources, providing a range of PDF options from traditional to contemporary styles. A simple web search using keywords like “Tenebrae service PDF,” “Holy Week liturgy PDF,” or “Catholic Tenebrae PDF” yields numerous results.
Platforms like Canva, while primarily design tools, can be used to create visually appealing PDF order of worship booklets based on traditional or adapted Tenebrae texts. Remember to verify the source and liturgical appropriateness of any PDF before use, ensuring alignment with diocesan guidelines and Catholic doctrine.
XIX. Resources for Liturgical Texts
Several reputable sources provide the liturgical texts essential for a Catholic Tenebrae service. The Roman Missal, while not specifically dedicated to Tenebrae, contains the Psalms, readings, and prayers commonly incorporated. Breviaries, particularly those following the monastic tradition, offer the Matins and Lauds components central to the service’s structure.
Websites like the International Commission on English in the Liturgy (ICEL) provide approved English translations of liturgical texts, ensuring fidelity to the original Latin. Diocesan liturgical commissions often publish or recommend specific translations and adaptations for local use; Online repositories of liturgical documents, maintained by religious orders or academic institutions, can offer historical and contemporary texts.
For musical settings, particularly Allegri’s Miserere, sheet music is available through music publishers specializing in sacred choral works. Resources detailing the historical context and theological significance of the texts enhance understanding and appreciation of the Tenebrae service. Careful selection and accurate rendering of these texts are crucial for a reverent and meaningful observance.
XX. Canva and Visual Aids for Tenebrae
Canva, a versatile visual communication platform, offers numerous possibilities for creating impactful visual aids to enhance a Catholic Tenebrae service. While the service emphasizes darkness and simplicity, subtle visual elements can deepen the contemplative atmosphere. Canva allows for the design of projected texts, eliminating the need for printed programs and minimizing light disturbance.
Simple, symbolic imagery – such as a darkened cross, a veiled statue, or representations of the instruments of the Passion – can be created and displayed. Backgrounds should be dark and muted to reinforce the theme of shadow and mourning. Consider designing slides with the Psalm verses, particularly Psalm 51 (Miserere), for communal reading.
Canva’s templates can be adapted to create announcements or reminders about the service. However, avoid overly elaborate designs; the focus should remain on the liturgy and the spiritual experience. Remember to download designs as high-resolution images or PDFs for optimal projection quality. Utilizing Canva thoughtfully can contribute to a more engaging and reverent Tenebrae observance.
XXI. Understanding the Eschatological Themes
The Tenebrae service is profoundly rooted in eschatological themes – the study of “last things” – centering on death, judgment, and the hope of resurrection. The extinguishing of candles symbolizes the abandonment experienced by Christ and, by extension, humanity’s confrontation with mortality. This gradual descent into darkness mirrors the spiritual darkness of sin and the anticipation of Christ’s descent into the tomb.
The service prepares the faithful for the solemnity of Good Friday and the vigil of Easter. It’s a meditation on the ultimate fate of humanity and the promise of salvation through Christ’s sacrifice. The Strepitus – the sudden, jarring noise – traditionally represented the shock of the earthquake following Christ’s death, and the scattering of the disciples.
Examining Catholic Tenebrae service PDFs reveals a consistent emphasis on these themes through the selected readings and psalms. The service isn’t merely a historical re-enactment, but a powerful invitation to contemplate the mysteries of faith and the ultimate triumph of light over darkness, life over death. It’s a journey towards the hope offered by the Resurrection.
XXII. Tenebrae and the Passion of Christ
The Tenebrae service is inextricably linked to the Passion of Christ, serving as a deeply moving meditation on His suffering and death. Catholic Tenebrae service PDFs often feature readings specifically chosen to recount the events of Holy Week, from the Last Supper to the crucifixion. These texts immerse participants in the narrative of Christ’s final hours.
The extinguishing of candles during the service directly corresponds to the diminishing light in Christ’s life as He approaches His death. Each candle extinguished represents a stage in His Passion – betrayal, arrest, trial, and ultimately, crucifixion. The increasing darkness symbolizes the spiritual darkness that enveloped the world at that moment.
Psalm 51 (Miserere), frequently included, expresses profound sorrow and repentance, mirroring Christ’s anguish and humanity’s need for forgiveness. Allegri’s setting of the Miserere, historically performed in the Sistine Chapel, adds a layer of solemn beauty to this contemplation. The service isn’t simply about the Passion; it aims to draw the faithful into the experience of Christ’s suffering, fostering empathy and devotion.
XXIII. The Significance of Silence in the Service
Silence is a profoundly important element within the Catholic Tenebrae service, far exceeding mere pauses between readings or chants. PDF guides for the service often emphasize the intentional use of extended periods of silence, designed to facilitate deep personal reflection on the Passion of Christ and the weight of sin. This silence isn’t emptiness, but an invitation to encounter God in a more intimate way.
The extinguishing of candles is often followed by significant silence, allowing the symbolism of the diminishing light to resonate with worshippers. This darkness, coupled with quietude, creates an atmosphere conducive to prayer and contemplation. It mirrors the abandonment felt by Christ and the grief of His followers.
The strepitus – the sudden, jarring noise – dramatically breaks the silence, traditionally representing the earthquake following Christ’s death and the commotion surrounding His arrest. However, even after the strepitus, periods of silence return, allowing participants to process the emotional impact. These silences, detailed in many Tenebrae service PDFs, are crucial for internalizing the service’s message and fostering a deeper spiritual connection.